How Thermal Printer Images Are Generated: Dithering Explained (With a Live Preview Tool)
How Thermal Printer Images Are Generated: Dithering Explained (With a Live Preview Tool)
Quick answer: A thermal printer can only burn a dot fully black or leave it fully white — there’s no grey. Dithering is the algorithm that converts a photo’s shades of grey and colour into a black-and-white dot pattern that still looks like a photo from a normal reading distance. Our apps use several different dithering algorithms — Floyd-Steinberg, Jarvis-Judice-Ninke, Sierra, and more — and you can try all of them yourself on our free browser tool before printing anything.
Why a Thermal Printer Can’t Just “Print a Photo”
A thermal printer’s print head is a row of tiny heating elements pressed against heat-sensitive paper. Each element is either on (burns a black dot) or off (leaves the paper white) — there’s no way to burn “50% black.” That’s the whole mechanical constraint: a thermal printer is a 1-bit device. Every pixel it prints is one of exactly two values.
A normal photo, by contrast, has 256 shades per colour channel. Somewhere between your phone’s photo and the printer’s heating elements, all of that tonal range has to get squeezed down to black-or-white — and doing that well, instead of just rounding every pixel to whichever is closer, is what dithering solves.
The Simplest Approach: Threshold — And Why It Looks Bad
The most obvious method is a straight cutoff: convert the image to greyscale, then turn every pixel darker than 50% grey to black, and everything lighter to white. This is called Threshold dithering, and it’s fast — but it throws away almost all the image’s detail. Gradients turn into hard blobs, faces lose all shading, and mid-tones just vanish. It’s genuinely useful for one thing: pure black-and-white line art and simple icons, where there was no grey to lose in the first place.
Error Diffusion: The Trick That Actually Works
Every good dithering algorithm — Floyd-Steinberg, Jarvis-Judice-Ninke, Sierra — is built on the same core idea, called error diffusion:
- Look at a pixel’s grey value. Round it to black or white.
- That rounding was wrong by some amount — the error. A pixel that was 60% grey and got rounded to white was “too light” by a specific, calculable amount.
- Instead of discarding that error, push it onto the neighbouring pixels that haven’t been processed yet — partly to the pixel on the right, partly to the pixels below.
- Move to the next pixel and repeat. Its grey value now includes the error inherited from its neighbour.
The effect: no single pixel carries much error, but the average darkness across any small region of the image stays accurate. A smooth grey gradient turns into a pattern of black and white dots that gets denser as the grey darkens — from a normal viewing distance, your eye blends that dot pattern back into a grey gradient. This is exactly how halftone printing and newspaper photos have worked for over a century; dithering is just the digital version.
Floyd-Steinberg — The One to Use for Photos
Floyd-Steinberg, published in 1976, is still the standard error-diffusion algorithm because it’s simple and looks good. After rounding a pixel, it distributes the error to its 4 nearest unprocessed neighbours in fixed proportions:
        [pixel]  7/16 →
1/16 ↙   5/16 ↓   3/16 ↘
7/16 of the error goes to the pixel immediately to the right, 3/16 to the pixel below-left, 5/16 below, and 1/16 below-right. That’s it — the entire algorithm. It’s what Thermal Image Printer and Bluetooth-USB Thermal Printer+ use by default for photos, faces, and product shots, because it produces natural-looking gradients without over-complicating the calculation.
Jarvis-Judice-Ninke — The One to Use for Logos
Jarvis-Judice-Ninke spreads the same idea across a much wider neighbourhood — 12 pixels across the current row and the next two rows below, instead of Floyd-Steinberg’s 4. Spreading the error further apart produces smoother, less noisy results in flat-colour areas, at the cost of being roughly 3x more work to compute. That trade-off makes it the better choice for logos, brand marks, and images with fine text — anywhere a flat background staying genuinely flat matters more than raw sharpness.
Sierra and Two-Row Sierra — Fewer Artefacts
Floyd-Steinberg has a known weakness: on certain mid-tone areas, it can produce visible diagonal “worm” patterns. Sierra (and the lighter Two-Row Sierra) uses a differently-shaped error kernel that largely avoids this, at a similar computational cost to Jarvis-Judice-Ninke. It’s the method to reach for on images with a lot of fine, complex texture — fabric, food close-ups, detailed product photography — where Floyd-Steinberg’s occasional patterning is most noticeable.
Ordered Dithering: A Different Approach Entirely
The 2×2 and 4×4 ordered-dither methods don’t diffuse error to neighbours at all. Instead, each pixel is compared against a fixed threshold value from a small repeating matrix, based on its position — pixel (x, y) always gets compared against the same matrix cell as pixel (x+4, y+4). This is faster than error diffusion since there’s no dependency between pixels, but it produces a visible, regular grid-like texture instead of the more organic-looking noise of error diffusion. Useful for a quick preview or a stylised look — less useful when you want the print to look like a genuine photo.
Try It Yourself — Live in Your Browser
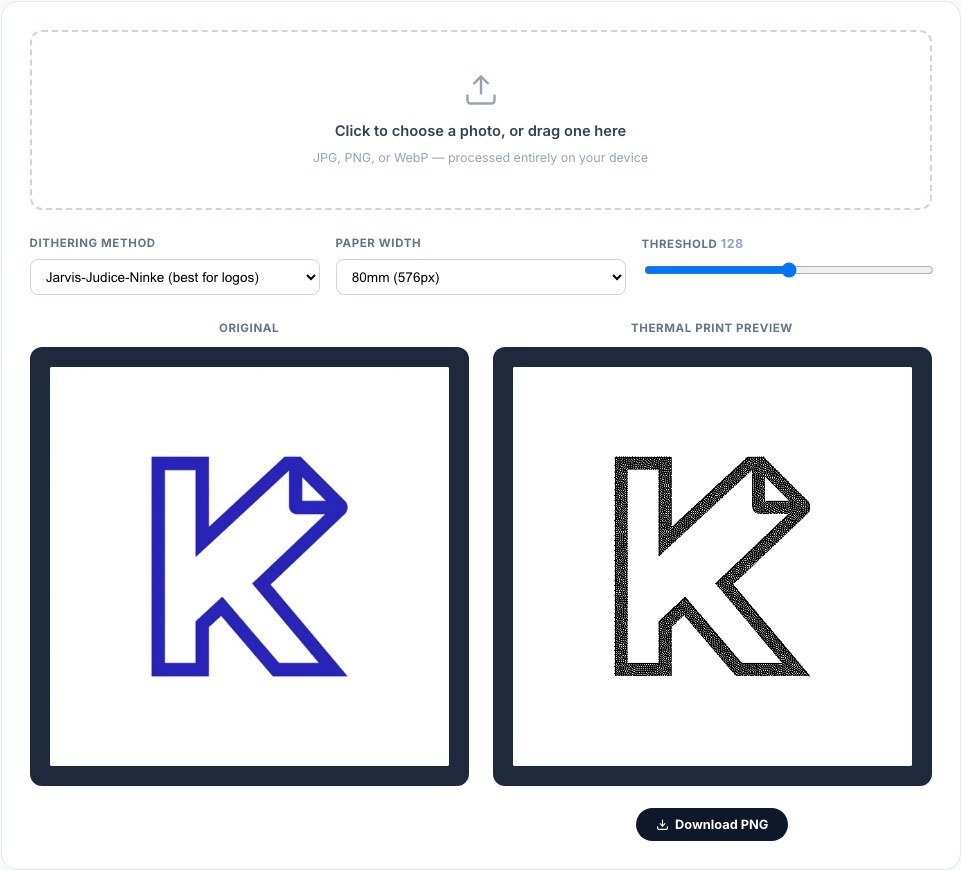
Reading about dithering only goes so far — the differences are much clearer when you can compare them side by side on your own photo. Our free dithering preview tool runs all of the methods above using the exact same coefficients as our Android apps, entirely in JavaScript in your browser. Nothing is uploaded anywhere — the whole thing runs on-device using the Canvas API, the same way it would run inside the app.
Upload a photo, switch between methods, and watch the print preview update instantly. When you’ve found the method that looks right, download the result or open one of the apps below to print it for real.
Frequently Asked Questions
What is dithering in thermal printing?
Dithering is the algorithm that converts a greyscale or colour image into the black-and-white dot pattern a thermal printer can actually produce, since thermal print heads can only burn a dot fully on or fully off — there’s no grey in between.
Which dithering method looks best for photos?
Floyd-Steinberg. It’s the default in both Thermal Image Printer and Bluetooth-USB Thermal Printer+ for exactly this reason — it produces the most natural-looking gradients for faces, products, and general photography.
Which dithering method is best for logos?
Jarvis-Judice-Ninke. It spreads rounding error across a wider area, which keeps flat background colours cleaner and edges crisper — important for a logo or brand mark where noise in the background is very noticeable.
Does the preview tool actually print anything?
No — it only shows you what the result would look like. To print for real, use Thermal Image Printer or Bluetooth-USB Thermal Printer+ on Android, which use these same algorithms.
Is my photo uploaded when I use the tool?
No. Everything runs locally in your browser using the Canvas API — your image never leaves your device.
Get Started
Try the dithering preview tool →
Download Thermal Image Printer →
See Bluetooth-USB Thermal Printer+ →
See Simple Bluetooth Printer →